
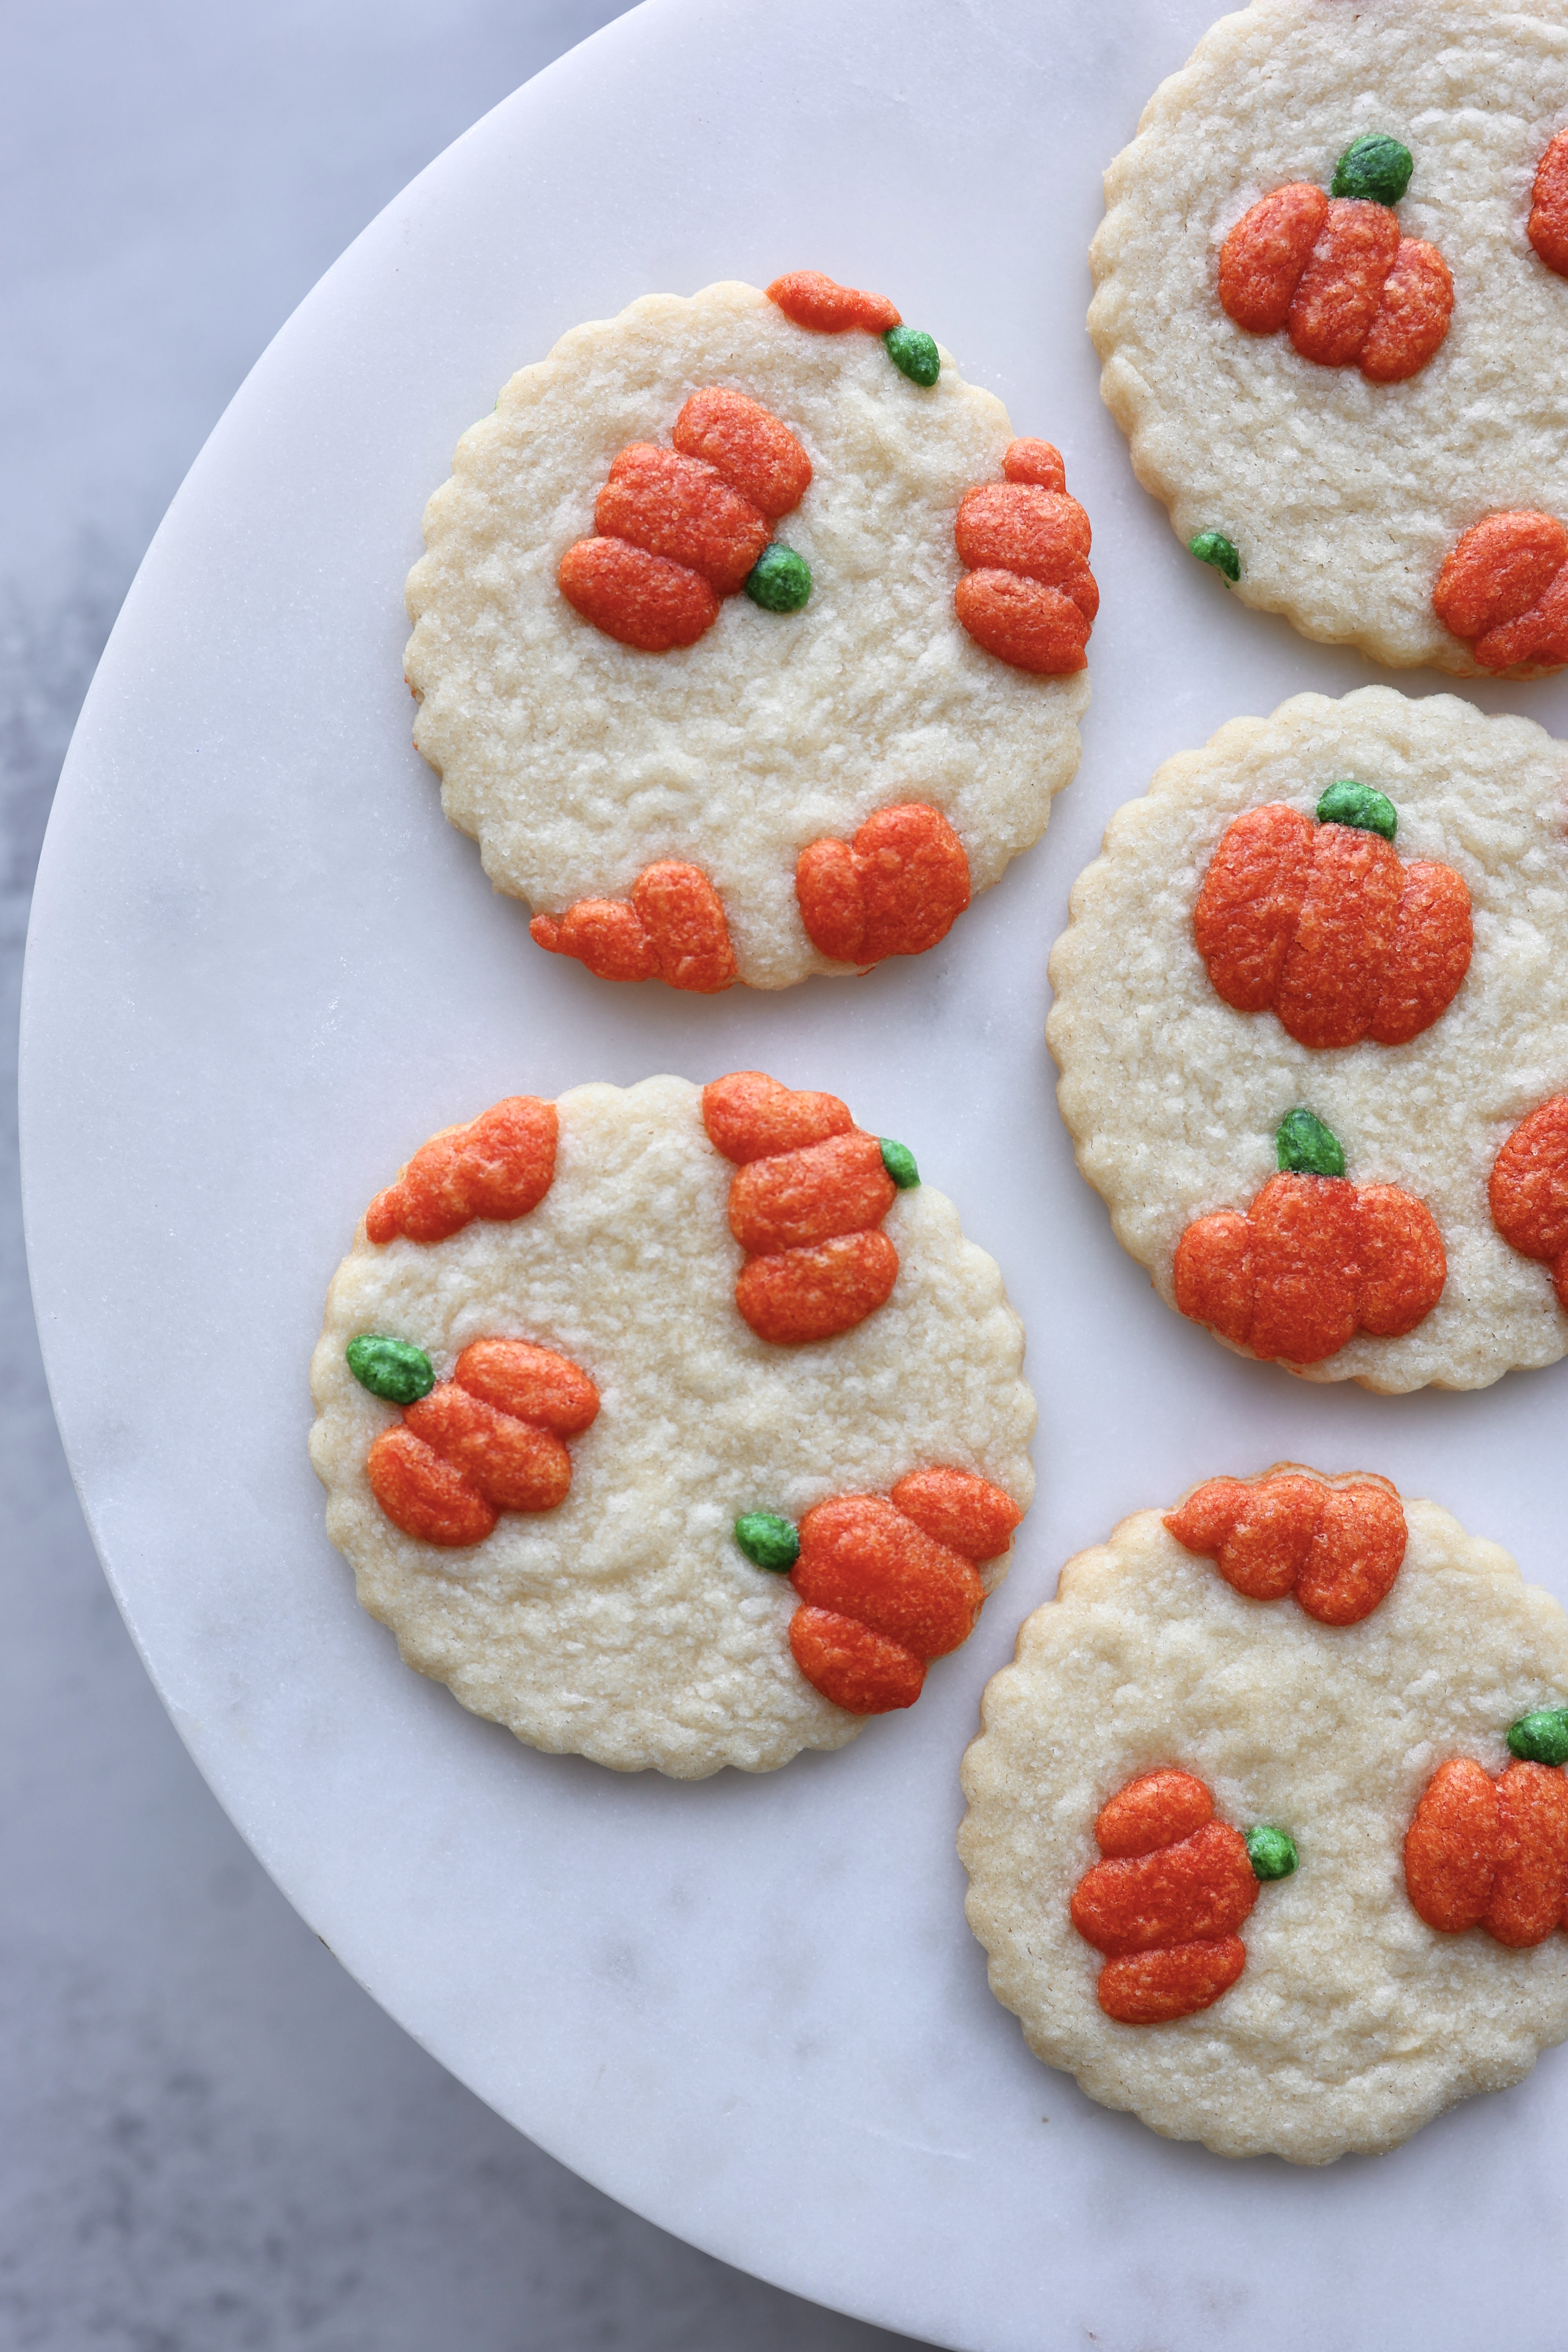
These Pumpkin Print Sugar Cookies are a fun and delicious way to celebrate the fall season. Using a classic sugar cookie base, you can add a festive pumpkin design that instantly transforms a simple cookie into something special. The recipe is easy to follow, versatile, and perfect for creating cookies that are both beautiful and tasty.
What makes these cookies so fun is their adaptability. The pumpkin design is ideal for autumn gatherings, Halloween parties, and Thanksgiving desserts, but you can also swap out the design for other holidays and occasions throughout the year. With a few simple ingredients and a little creativity, these cookies become a festive centerpiece for any celebration.
Serve these Pumpkin Print Sugar Cookies at your next fall party, package them as homemade gifts, or enjoy them with a warm drink on a cozy evening. The buttery sugar cookie base paired with a seasonal design makes them a treat that will impress both kids and adults. Roll out the dough, print your pumpkins, and get ready to enjoy a cookie that looks as good as it tastes.
A Note From Colby:
I have been making these sugar cookies with my family forever but never have I decorated them using the dough! You can use this recipe minus the food coloring (and pumpkins obviously) if you are just looking for a basic sugar cookie. They will still taste fantastic!
Wishing you Good Taste!
xoxo, Colby
If you give this recipe a try, post a pic and tag @colbytroy on Instagram so I can see your beautiful creations!
Ingredients
Sugar Cookies
- 1/2 cup unsalted butter
- 1 cup white sugar
- 1 egg
- 1 1/2 tsp vanilla extract
- 1/2 tsp almond extract
- 1/2 tsp salt
- 1 3/4 cups all purpose flour
- 3 drops orange food dye
- 2 drops green food dye
Step By Step Instructions
Follow these step-by-step instructions, then scroll down to the recipe card for a full ingredients list and method

How to make the perfect Pumpkin Print Sugar Cookies
Using a hand mixer, beat the butter and sugar together in a large bowl until combined. Add in the egg, vanilla, and almond extract and beat well.
Scrape down the sides of the bowl and add in the salt and flour. Mix until fully combined before removing the dough from the bowl.
Once you have a nice dough formed, remove about 3/4 cups of it to dye orange. Next, take out 1 Tbsp. of dough to be dyed green. Keep the remaining dough in the bowl.
Use gloves if you have them to dye the first removed portion of dough orange, then the other portion green. To do this, add a drop of food gel at a time to the dough and work it into the dough until it is evenly distributed and has reached the perfect shade for the pumpkins.
Flatten each color of dough into a disc and wrap in plastic wrap to chill in the fridge for at least two hours.
Preheat the oven to 350°F and line a baking sheet with parchment paper.
On a floured surface, roll out the uncolored cookie dough with a rolling pin to an 1/4 inch thickness.
Form your pumpkins out of the orange dough to be about a 1/2 inch in size. You will need roughly 38 completed pumpkins to cover the dough (114 individual pumpkin pieces for a 3 bulb pumpkin *reference picture*). Once all are formed, transfer pumpkins onto the rolled out dough; spacing evenly. Using the green dough, form 38 small ovals and add the to the dough to be the pumpkin stems.
Place a sheet over the decorated dough and LIGHTLY roll your rolling pin over the dough sheet to secure the pumpkins.
Remove parchment paper. Cut out shapes using a cookie cutter and carefully transfer to the prepared baking sheets. Depending on the size of your cookies, bake for 8 to 12 minutes or until the edges are just about golden brown.
Allow cookies to cool before transferring to a wire rack.


How to store your Sugar Cookies
IF there’s any cookies left over; these cookies can be stored in an airtight container for up to 3 days, or in the freezer for at least 2 months.
Tools & Supplies for Making Sugar Cookies:

Pumpkin Print Sugar Cookies
Ingredients
- 1/2 cup unsalted butter
- 1 cup white sugar
- 1 egg
- 1 1/2 tsp vanilla extract
- 1/2 tsp almond extract
- 1/2 tsp salt
- 1 3/4 cups all purpose flour
Pumpkin Design
- 3 drops orange food dye
- 2 drops green food dye

Instructions
- Using a hand mixer, beat the butter and sugar together in a large bowl until combined. Add in the egg, vanilla, and almond extract and beat well.1/2 cup unsalted butter, 1 cup white sugar, 1 egg, 1 1/2 tsp vanilla extract, 1/2 tsp almond extract
- Scrape down the sides of the bowl and add in the salt and flour. Mix until fully combined before removing the dough from the bowl.1/2 tsp salt, 1 3/4 cups all purpose flour
- Once you have a nice dough formed, remove about 3/4 cups of it to dye orange. Next, take out 1 Tbsp. of dough to be dyed green. Keep the remaining dough in the bowl.3 drops orange food dye, 2 drops green food dye
- Use gloves if you have them to dye the first removed portion of dough orange, then the other portion green. To do this, add a drop of food gel at a time to the dough and work it into the dough until it is evenly distributed and has reached the perfect shade for the pumpkins.
- Flatten each color of dough into a disc and wrap in plastic wrap to chill in the fridge for at least two hours.
- On a floured surface, roll out the uncolored cookie dough with a rolling pin to an 1/4 inch thickness.
- Form your pumpkins out of the orange dough to be about a 1/2 inch in size. You will need roughly 38 completed pumpkins to cover the dough (114 individual pumpkin pieces for a 3 bulb pumpkin *reference picture*). Once all are formed, transfer pumpkins onto the rolled out dough; spacing evenly. Using the green dough, form 38 small ovals and add the to the dough to be the pumpkin stems.
- Place a sheet over the decorated dough and LIGHTLY roll your rolling pin over the dough sheet to secure the pumpkins.
- Remove parchment paper. Cut out shapes using a cookie cutter and carefully transfer to the prepared baking sheets. Depending on the size of your cookies, bake for 8 to 12 minutes or until the edges are just about golden brown.


Leave a Comment